Wildtile has many tools to help you create dual grid tilesets quickly and iteratively. The suggested workflow shows how to incorporate each tool to speed up development. You might find a different workflow works better for you and your team - once you find something you're comfortable with, please let us know by email so that future updates do not unnecessarily disrupt your workflow.
This tutorial should take around 30 minutes to complete. After that, we recommend experimenting further to gain a deeper understanding. Feel free to ask any questions on the Discord server.
Set Up
Follow the Getting Started Guide to completion to set up your world with an example tileset. We will build on this to set up your tileset.
Creating and Importing the First Two Tiles
Create your tileset's first two tiles. In this tutorial, we will create a skyscraper building tileset, requiring a flat wall and a wall-to-roof lip tile.
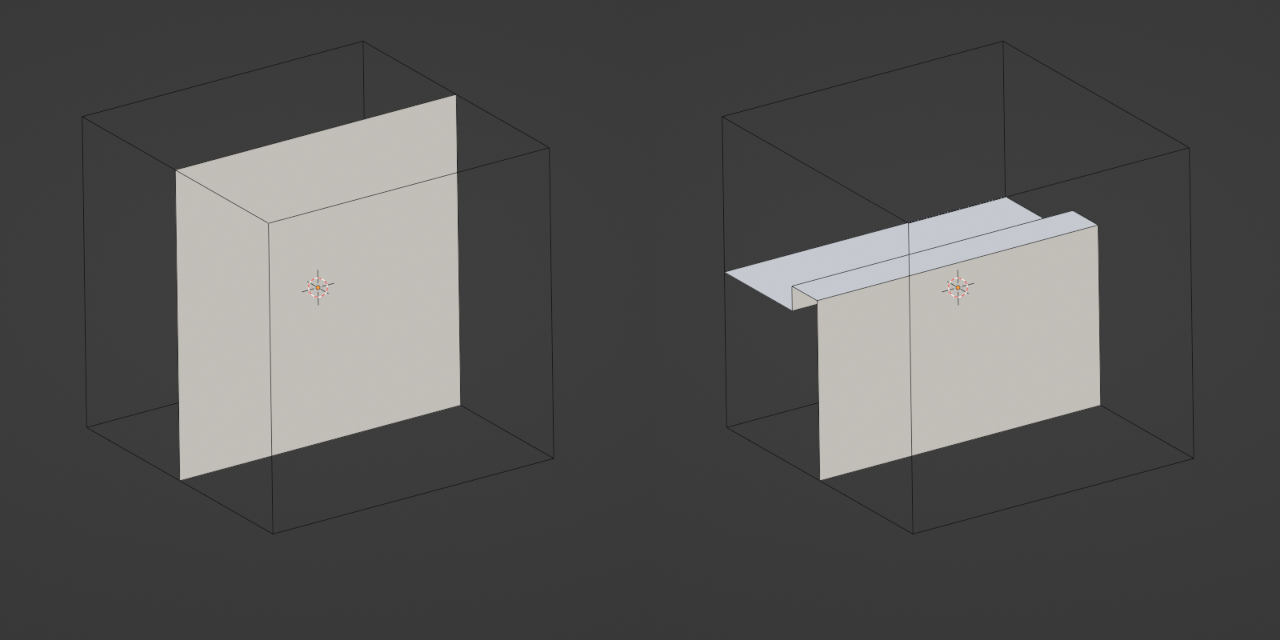
It doesn't matter about quality or style yet, but you must get the dimensions correct.
Tip
While you can use any tile dimensions you like, it is easiest to start with 1×1×1.
The importer derives tile settings from the tile models by making some assumptions about the models, lifting the mark-up work from the artist's shoulders. You will need to follow those assumptions so that the importer can do its job effectively:
Tiles you make must be manifold within the bounds of the tile - the mesh must form a continuous surface up until the borders of the tile.
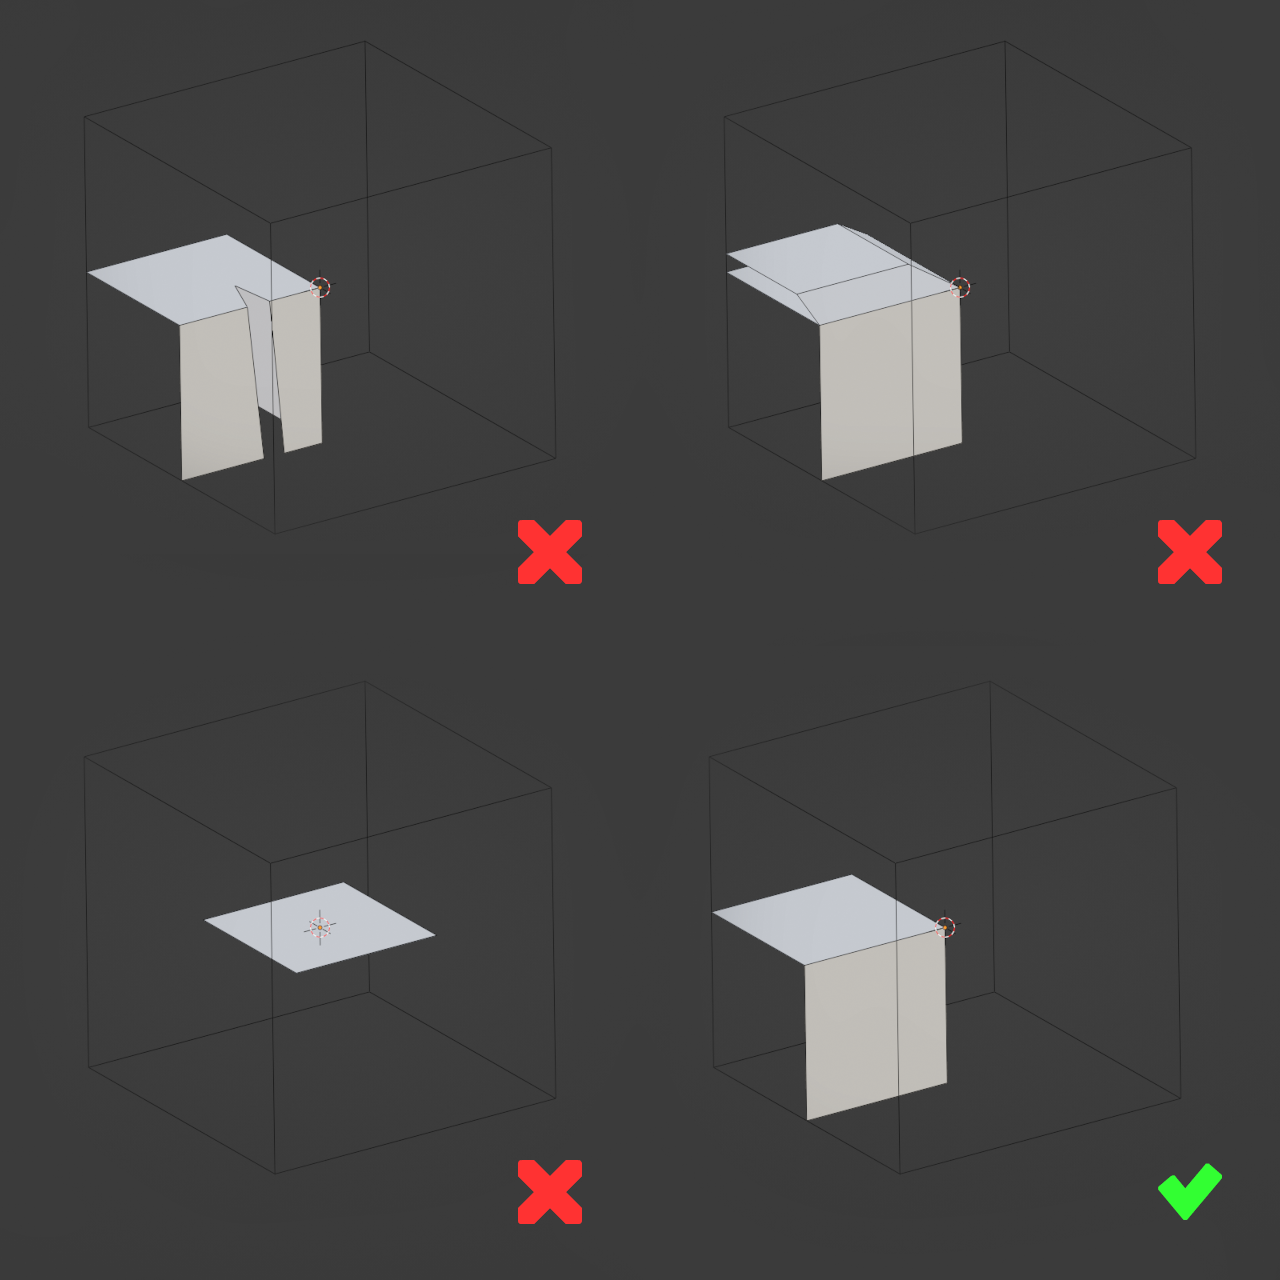
Tiles must not have faces on their borders.
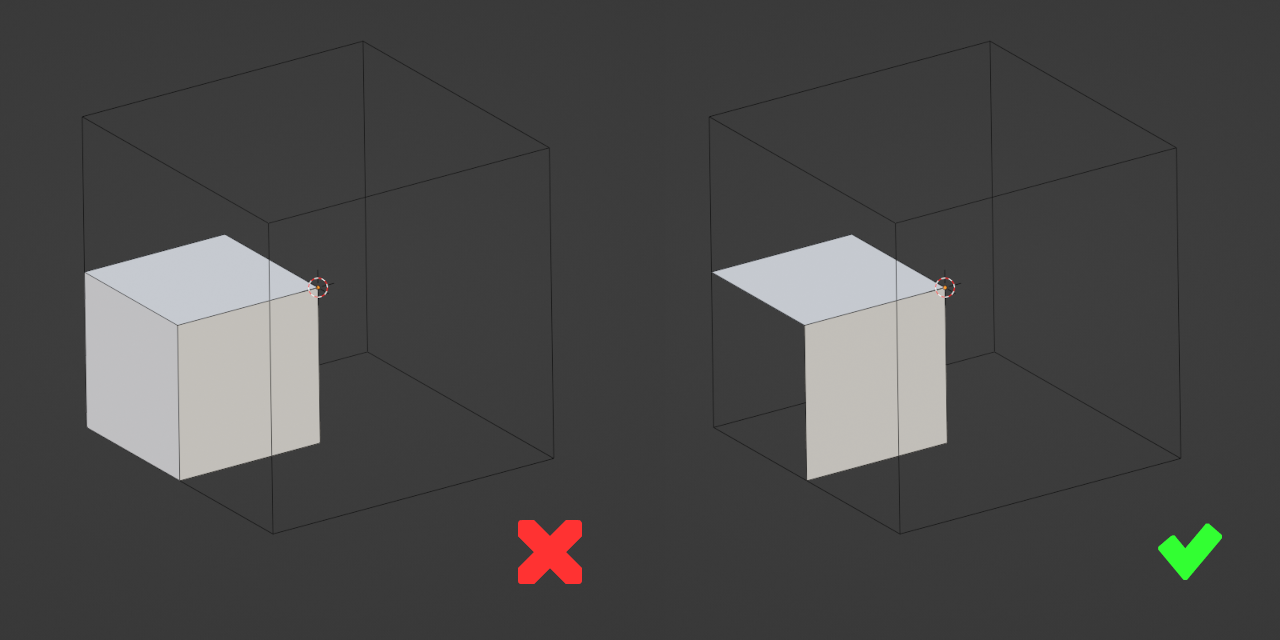
All tile vertices must be inside the bounds of the tile.
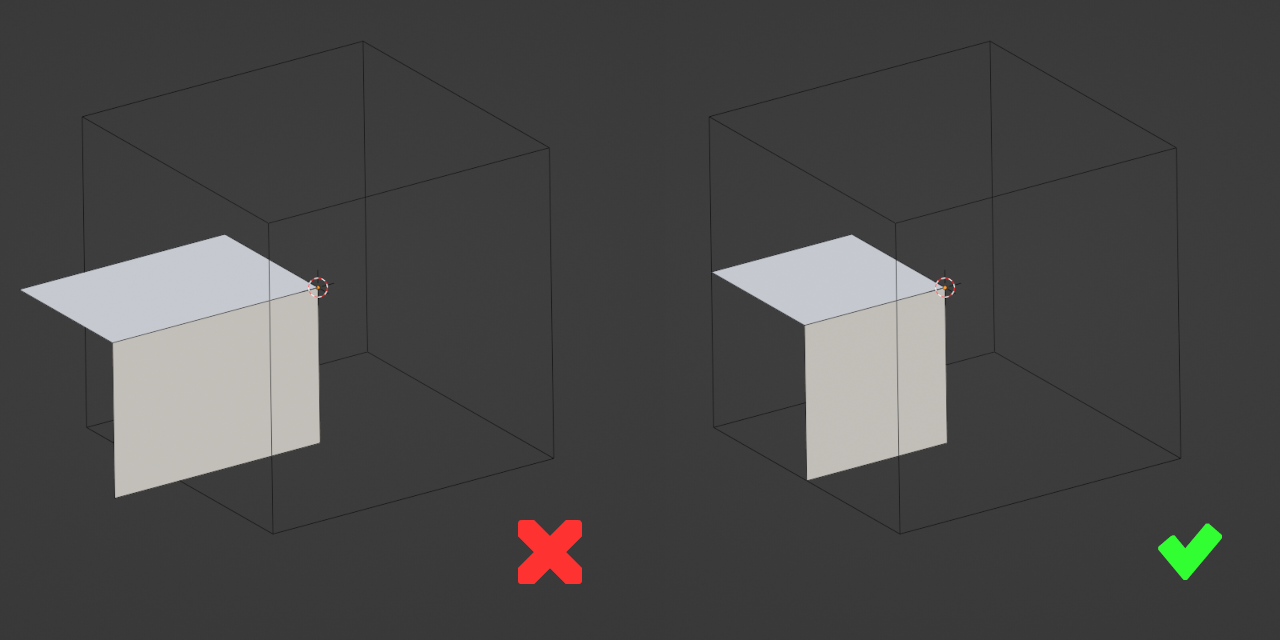
Tiles must be aligned to the grid.
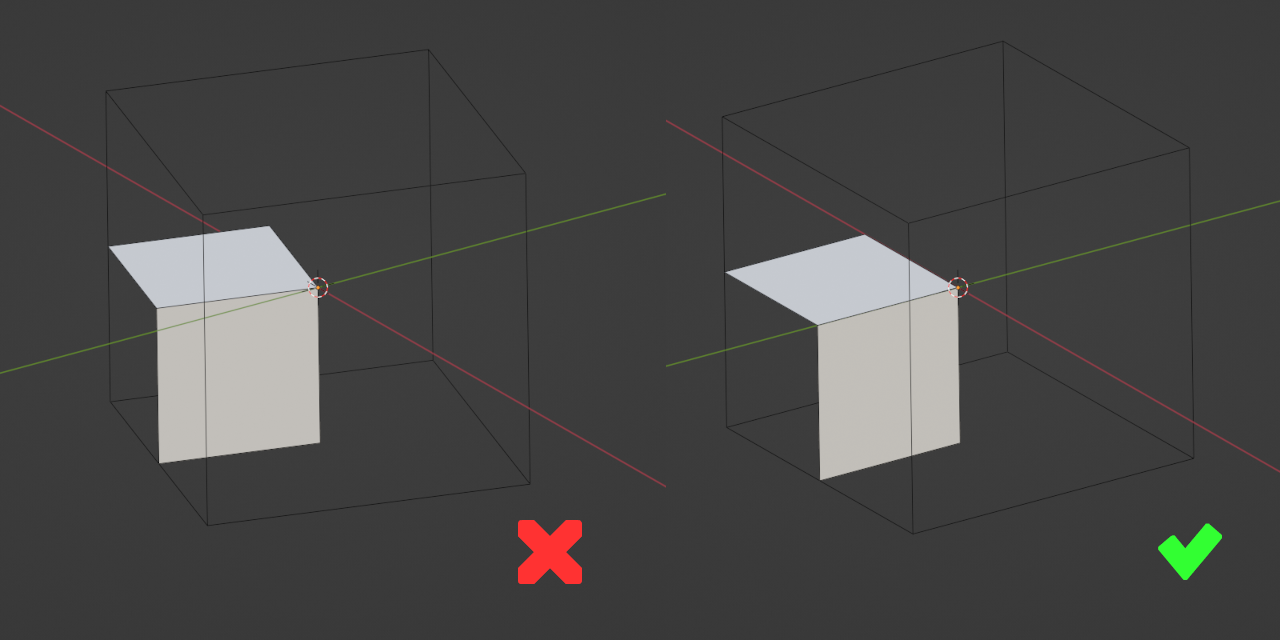
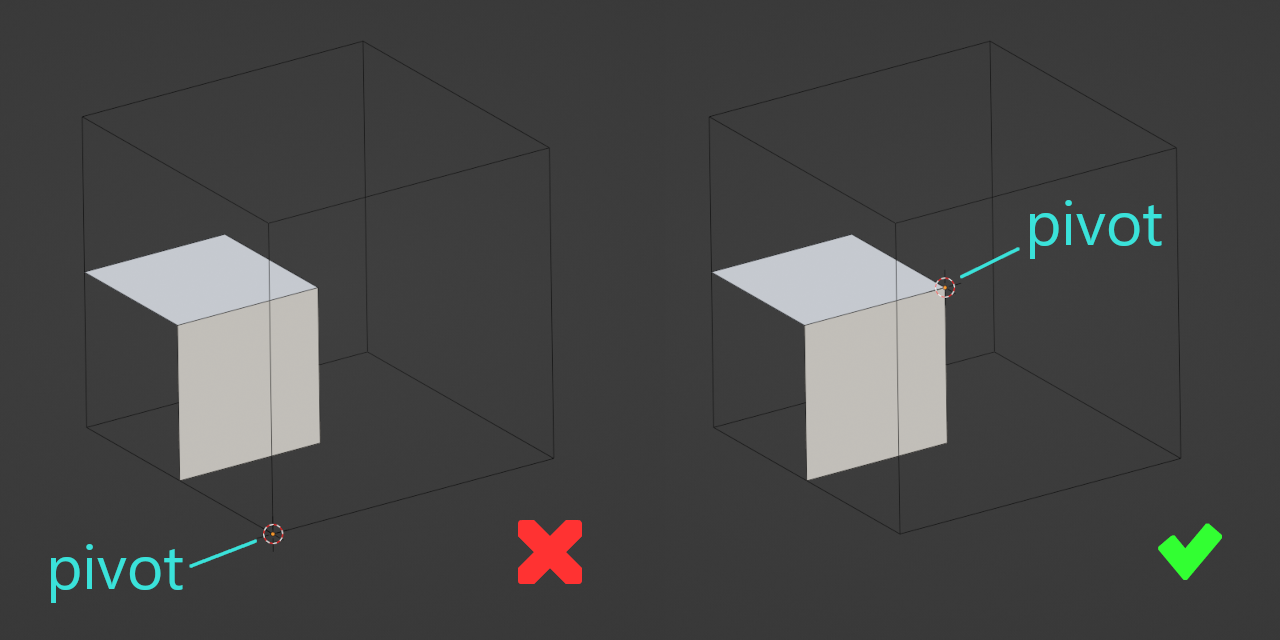
Tile object pivots must be at the centre of the model.
Caution
For the moment, avoid two-sided and transparent materials. Wildtile supports these materials but requires further set up to do so.
Still in your modelling software, ensure that the tiles are distinct objects and that their pivots are at the centre of the tile. The centre will be in the middle of the plane in the flat wall model. It will be halfway along the lip edge on the rooftop model.
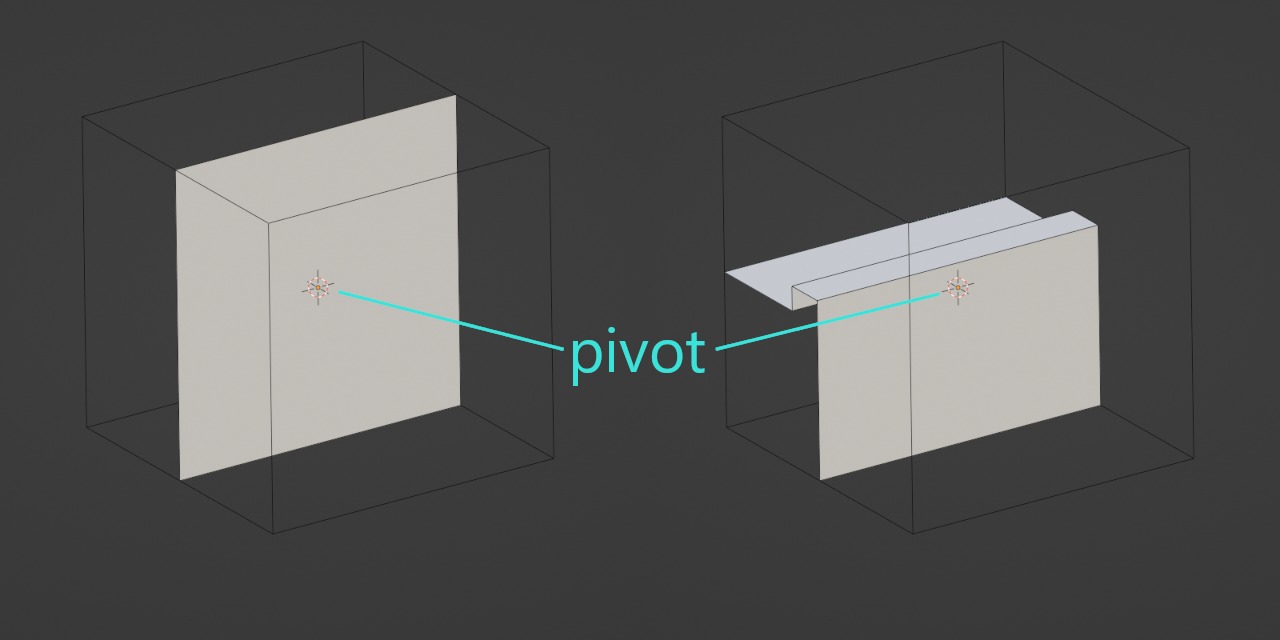
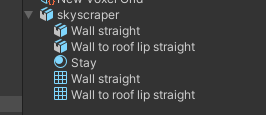
Export this model and import it into Unity. Ensure at this stage that the imported model has two children: the two tiles you've just created.
Note
2 tiles are required for the first working tileset because Unity's import process will remove the root object if there is only one child. Wildtile assumes that the source model is an empty parent and that each child is a tile.
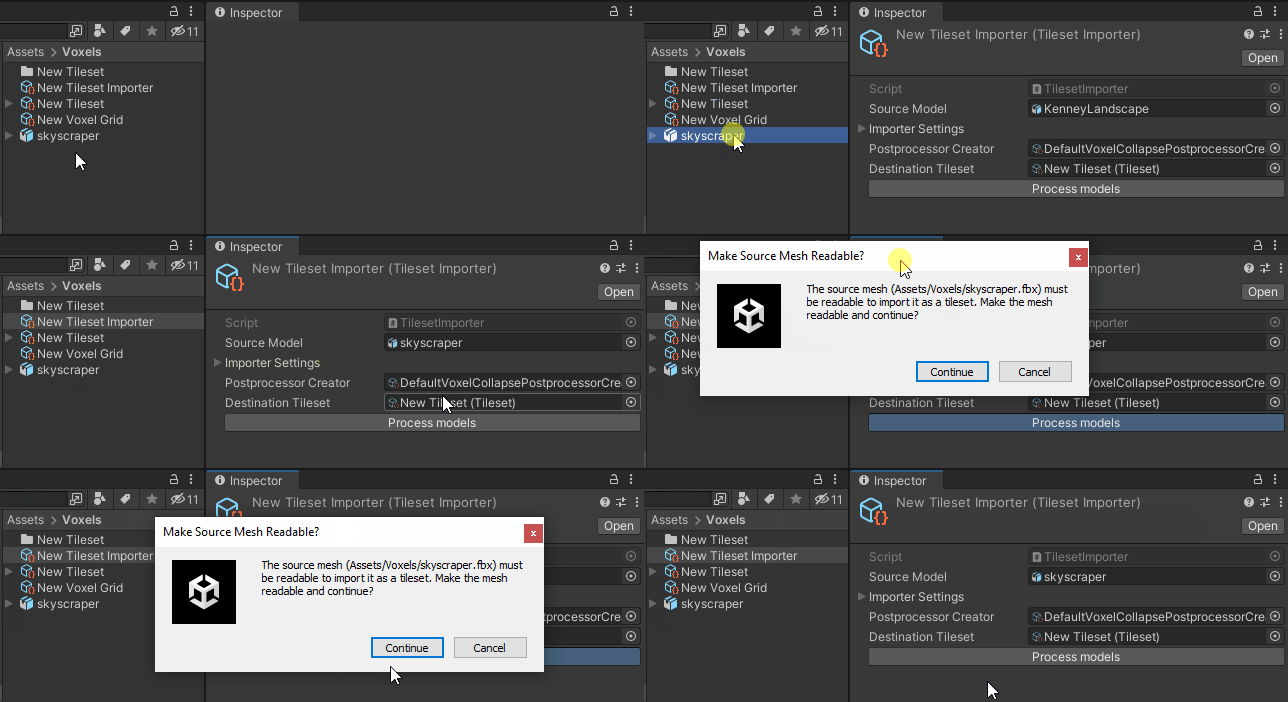
Select the tileset importer asset, then drag the new model asset onto it. Make sure that the dimensions in the importer are the same as the model, and click "Process models". A dialogue box will tell you that the Unity model importer settings prevent it from being imported by Wildtile, select Continue to allow Wildtile to alter the importer settings and continue with the import.
Finally, let's make Wildtile place the tiles. Select the grid placer game object in your scene. Press U to open the voxel editor and click to create a 2×2 tower. Press W to close the tool and trigger tile placement. They should place tiles along the straight walls and red shapes on the corners and roof.
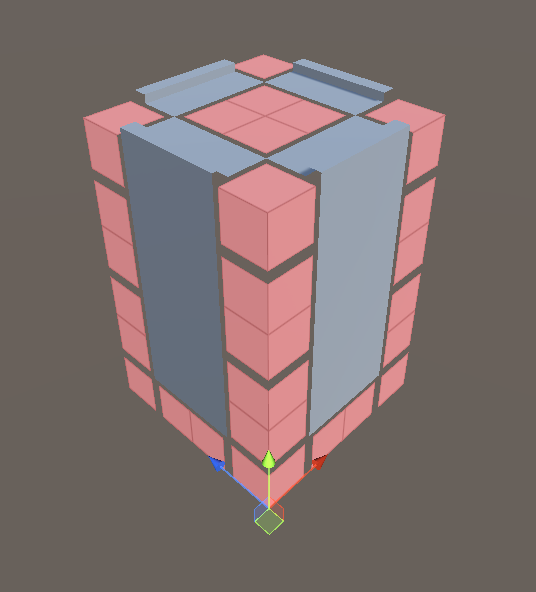
If your tower doesn't look like this, you can start debugging your tileset.
Creating a Skeleton Tileset
Once your workflow can reliably import models from the modelling software to Wildtile, you can focus solely on the modelling software for a while.
Create a list of dual grid tiles you expect will be very common in your maps. For example, when creating a skyscraper tileset, you would need:
- a straight wall tile (already made)
- a straight wall lip tile (already made)
- a straight wall-bottom to floor tile
- a flat tile for the floor
- a flat tile for the top of the roof (could be the same as the floor tile)
- a wall corner tile
- a wall corner lip tile
- a wall corner bottom to floor tile
Within your selected modelling software, create your first pass of all of these tiles. Feel free to explore your style here. Remember that all tiles must match the dimensions previously set up. Also, consider how tiles connect along their bounding-box faces while modelling them.
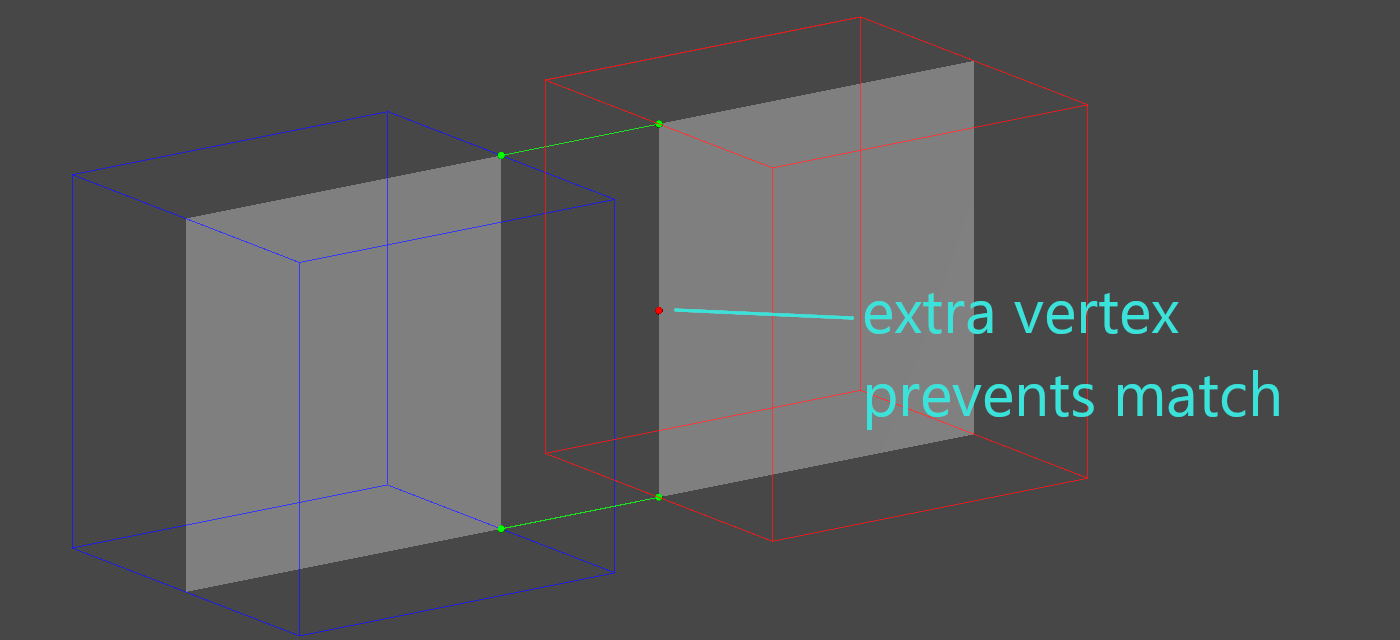
Wildtile matches tiles by the edges that run along their faces. For example, if one tile face has one edge running across it, it will not match a tile face with two edges, even if they lie on the same line.
Tip
Keep it simple! For your first tileset, try to use five or fewer edges for each tile face. This guideline makes creating the matching pattern on other tiles much easier.
Once you have created your skeleton tileset, export it to Unity with the same filename as your previous exported model. Now, select your tileset importer asset and click "Process models" in the properties window.
Iterating on the Tileset
In the Unity scene that contains the GridPlacer component, click on the placer object and change to the grid placement tool (default keyboard shortcut U).
Create a level that matches the tileset's use - as we're making a skyscraper tileset, create a few towers and a bridge connecting two of the buildings.
Return to a built-in Unity tool (default keyboard shortcut W).
Wildtile will turn the grid darker for a moment while calculating tile placement and then replace it with the tiles you created.
Note that alongside your tiles, there will also be some red grid objects.
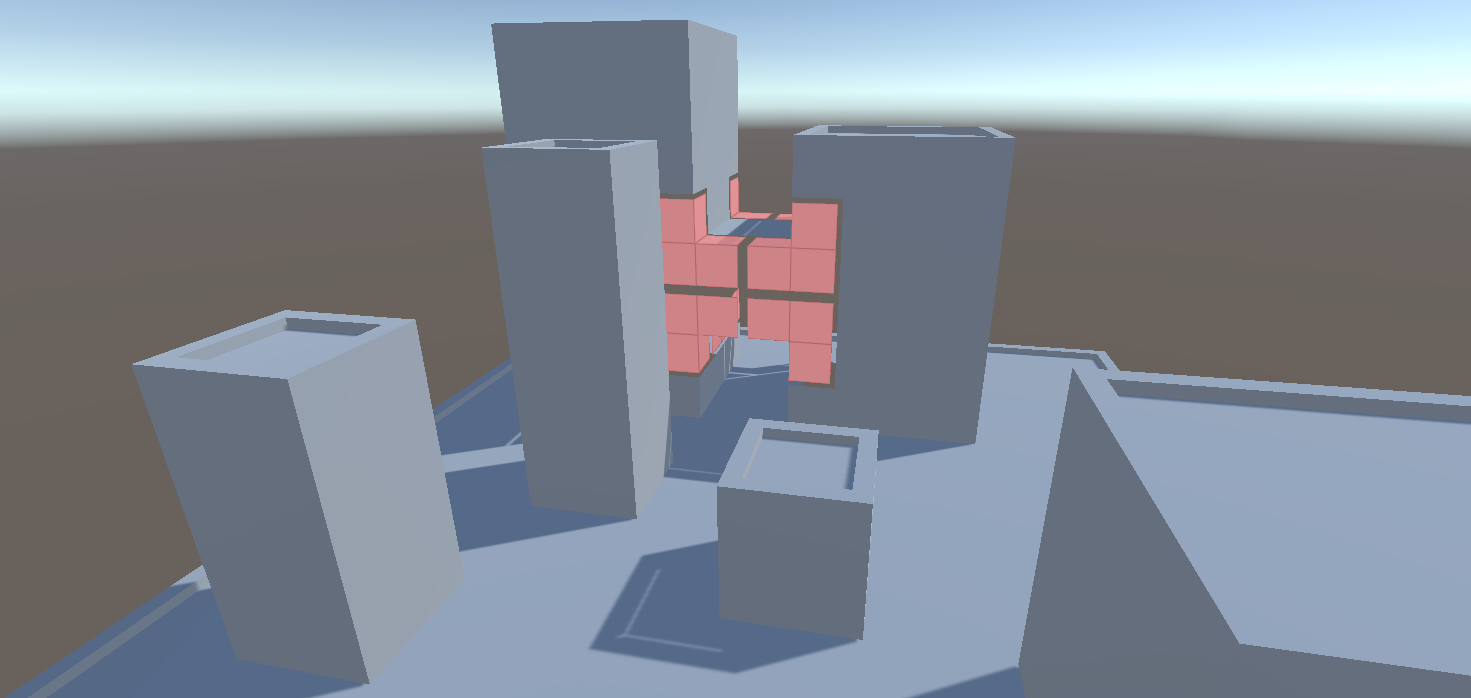
The red grid objects are wildcards. Wildtile places wildcards where there are no tiles that fit. These are a necessary part of creating your tileset iteratively: there is nothing wrong with them during development, but you should strive to avoid them in production levels.
Check that Wildtile has placed flat tiles on the floor and that the tiles connect to one another correctly. Also, ensure they are placed on any plateaus and connect to the clifftop lip tiles.
In general, your team can eliminate wildcards in one of two ways. The first requires a level designer to change the map to avoid layouts that lead to the missing tiles.
In the second option, the level designer passes the map to an artist, who then models the missing tiles and adds them to the tileset.
We will act as the artist now and model the missing tiles.
Choose one wildcard tile in the map. Ideally, the wildcard would have many adjacent modelled tiles and few (or zero) connections to other wildcards. Create this tile in your modelling software in the same file as the other tiles. Ensure that the faces' edges match the adjacent models in the map.
Tip
It can be worthwhile to spend a few seconds considering how to connect the tile faces and even sketching a rough concept piece for each new tile before starting modelling.
Reexport your tileset to Unity. Find the importer asset and click "Process models". Your tileset asset will be updated, and you can now select your grid placer scene object and click "Force Map Rebuild" to use your new models.
Hopefully, you will immediately see that your new model has replaced some of the wildcards. However, if you notice any issues, such as the new tile not being placed or some of the adjacent tiles have become wildcards, start debugging your new tile.
Once Wildtile correctly uses your new tile in tandem with the existing tiles, pick another wildcard to focus on and replace it with a modelled tile - repeat this until your model is complete.
Further Reading
If you created all of your models perfectly first time, the article would not have prompted you to debug your tileset. This is an important technique when developing tiles as it allows you to identify mismatches between tiles. If you haven't already used the debugger, create an intentionally mismatching tile now and use the tileset debugger.
You may find it easier to create expansive, multi-tile-wide features in a traditional modelling workflow and use automated tools to slice your tiles up when exporting them. Look at Model Slicing to see an example and consider if it's appropriate for your use case.